Sometimes I find myself needing to run a few command on a remote machine. I’ll
usually ssh into the box and hack away. But, there is an a alternative. You can
run command over SSH!
In the example below, I wasnted to keep the configuration files in the git
repository, but wanted a quick and dirty way to deploy the changes.
The first half of the script copies files, using scp, from the local machine to
the remote server.
The second half of the script (starting on line 12) runs commands from the
remote machine. The files are moved to the correct locations and nginx and
haproxy are restarted.
1234567891011121314151617181920
#!/bin/bashPEM=id_rsa.pub
HOST=ec2-54-234-130-49.compute-1.amazonaws.com
scp -i ~/.ssh/$PEM ./surrogate_pop.conf ubuntu@$HOST:/tmp
scp -i ~/.ssh/$PEM ./haproxy.cfg ubuntu@$HOST:/tmp
scp -i ~/.ssh/$PEM ./traffic_cop.lua ubuntu@$HOST:/tmp
scp -i ~/.ssh/$PEM ./allowed_domains.lua ubuntu@$HOST:/tmp
## These are executed on the remote hostssh -i ~/.ssh/$PEM ubuntu@$HOST'bash -s'<<EOFsudo mv /tmp/traffic_cop.lua /usr/share/nginx/traffic_cop.luasudo mv /tmp/allowed_domains.lua /usr/share/nginx/allowed_domains.luasudo mv /tmp/surrogate_pop.conf /etc/nginx/sites-enabled/surrogate_pop.confsudo service nginx restartsudo mv /tmp/haproxy.cfg /etc/haproxy/haproxy.cfgsudo service haproxy restartEOF
Recently, I’ve been excited by serverless
technology. I began using the serverless framework
for code boilerplate and deployment. After some time using the framework, I began feeling pain.
Serverless is an excellent project, but it’s moving very fast. For example, The
framework uses cloudformation for resource dependencies such as dynamoDb, ApiGateway, roles and permissions (to name a few).
Cloudformation is also moving very fast. Support for ApiGateway was added to cloudformation on April
18th, 2016.
As new features are added to cloudformation, you’ll be stuck waiting for
serverless to implement features for feature parity. I’ve started using
cloudformation direclty and relying on bash scripts for deployment. I’m quite
happy with the results.
Cloudformation stack
Once we have a
cloudformation template,
the AWS cli provides us with everthing we need. Using the AWS CLI we can create the stack like so.
Everyone loves clever, right!?. Well, DONT! A clever solution is technical debt.
Any fool can write code that a computer can understand.
Good programmers write code that humans can understand. – Martin Fowler
So why do we do this? I belevie we enjoy knowing something that confuses others. It makes us feel smart. But please avoid this. Avoid this for your app, for your teammates, and for your future self.
Rails 4 brought us ActiveModel::Model. It provides a light weight interface that’s similar to an ActiveRecord::Base model.
for example, I can create a Person class like so.
12345678910
classPersonincludeActiveModel::Modelattr_accessor:name,:agevalidates:name,truedefsave## Do cool stuff here...endend
12345678
Loadingdevelopmentenvironment(Rails4.2.1)irb(main):001:0>p=Person.newage:21=>#<Person:0x007fc6367193b0 @age=21>irb(main):002:0>p.valid?=>falseirb(main):003:0>p.errors=>#<ActiveModel::Errors:0x007fc638000a68 @base=#<Person:0x007fc6367193b0 @age=21, @validation_context=nil, @errors=#<ActiveModel::Errors:0x007fc638000a68 ...>>, @messages={:name=>["can't be blank"]}>irb(main):004:0>
This is great for instances where you don’t need a full database backed Active Record model. I’ve used them for form objects and in controllers where I have complex logic.
You can think of these as higher level abstractions above your ActiveRecord classes. Also, be conscious of the dependancy direction. An ActiveModel model can depend on an ActiveRecord model but your ActiveRecord models shouldn’t depend on an ActiveModel model.
Here’s a more involved example.
Lets say I have 2 ActiveRecord classes Org and User
Now I’ll create an ActiveModel model (non database)
Notice the validates_each method… Its going to check each of the ActiveRecord objects and let them raise up any errors to the Signup class.
1234567891011121314151617181920212223242526272829
classSignupincludeActiveModel::Modelattr_accessor:first,:last,:namevalidates_each:user,:orgdo|record,attr,value|unlessvalue.valid?value.errors.each{|k,v|record.errors.add(k.to_sym,v)}endend## must return booleandefsaveifvalid?org.save&&user.saveelsefalseendendprivatedeforg@org||=Org.new(name:name)enddefuser@user||=User.new(first:first,last:last)endend
Awesome right!!
So why do all this? Well, the single responsibilty states that every class should have responsibility over a single part of the functionality provided by the software, and that responsibility should be entirely encapsulated by the class. ActiveRecord is responsible for persistence to the database. This will keep our classes with a narrow focus and allow us to refactor and create more use cases in the future. I think it’s a win. I find this strategy is generally good for one directional workflows such as signup or in a shopping app cart checkout.
I’ve been playing around with Public-key cryptography or asymmetric cryptography. With revaltions from Eric Snowden on programs like PRISM, I feel that encryption is more important than ever.
Public key encryption. A message is encrypted with a recipient’s public key. The message can only be unencrypted by the holder of the private key.
Digital Signature. A message is signed with a the senders private key to generate a cryptographic hash. Using the public key, one can verify the message was indeed sent with the coresponding private key and can ensure the message has not been altered.
Keys
First, let’s generate some keys. From the private key we will also generate the public key. Remember the private and public key are mathematically linked. This is important.
Great. Now we have a key pair. We can write these keys to disk if we like.
12345678
## write the private key to disk.File.open("~/.ssh/private_key","w+")do|f|f.writeprivate_key.to_pemend# write the public key to disk.File.open("~/.ssh/public_key.pem","w+")do|f|f.writepublic_key.to_pemend
We’ll be encrypting a message with the public key. So it can only be unenctrypted by the owner of the private key.
123
## Use the public key to encrypt a message[4]pry(main)>encrypted_data=public_key.public_encrypt("Some private data is here.")=>"\x9B\f\xD2\"\x02l\x0E\xFB\x18\xFA\xA2\xCC;\x9F\xC2r\xFA\x88\x94\\\xDBZY\x964\xE3\x13i\xDB\xB5\xB4<\x8E\xEC\xB8\xAB\"a\xE1\xE0\x01\x8Cb\xEC\xAE\x86\xC0!\x18\xC8\xA9\xDEB\e^\xCCe\x11\xDC\x19\x81\xDC\x98\x1EX\x11\xD6\"bUJ\xB0B\xED\x96\x03\x9F}\xF7I\xFD\x9F\x04\x04\xF4Q\xA7H\x9C\b\xC5\a\xE1\xA4\x02kx\xF46A% \xEB\xEB: \xD1\xA2\xFF\xA4$\xBDP\x9FR\xE9\xD3\x9F\r>\x8E5\xD9\x10\xE8\x9DYd\e`\x8E\xE0\xBD\xE5\\\x02\xF6\x83\v\x15\xD4m\x03\xCDJ\x9A*\xA6\xF5S9\xD2M\x10\xD5 7\x92\xCE\xF0\xB9<\xAFe\x9A\xAE\x8E`\xADW\x93\x91;HZ\xEB\xD8\xFF\xDE\x02\x10m\x9D\xF2*\tL2\xE2`K\xC8\x0E)O\x86\xDA\xAFk4\xD0\rN\xF3%}\xEAM\x15he\xDF\x0F\xC6\xE5\xAA$\x19\x03V\xBE\x0E~\x8ELv\x9C\xC7\xB4o\xA13\xE2\xDE\xE2t!]-\xC8\x88\xAF\xE3\xD5\xFD`T\xD9\xCDs\xFF\xAE(<\xBD\xB9"
This will result in some unreadable binary data. Next we’ll decrypt this data with the private key.
123
## Use the private key to decrypt[5]pry(main)>private_key.private_decrypt(enc)=>"Some private data is here."
Nice!
The public key can encrypt but cannot decrypt the message. This enctryption only works in one direction. Only the private key can decrypt that message. You can also encrypt messages with a private key. Those messages can be unenctrypted with the public key and the private key.
Asymmetric public/private key encryption is slow and victim to attack in cases where it is used without padding or directly to encrypt larger chunks of data. Typical use cases for RSA encryption involve “wrapping” a symmetric key with the public key of the recipient who would “unwrap” that symmetric key again using their private key.
NOTE - The enctrypted messages are in binary format. If we want to encode the data for transmission accoss the net, we’ll want to use something like base64.
This works for small messages but if you try and encrpt a string larget than your key… you’ll hit an errors. You could break up the string into smaller chunks and encrypt each chunk individually. But this is not secure. This is what cypher block chaining is for. Below is an example.
Asymmetric digital signatures is a great way to verify integrity and authenticity of data. Create a keypair, send the public key to your receivers, and use this method to create a digital signature. By combining the data and the public key, you can verify that the signature was created by the owner of the private key.
1234567891011121314151617
require"openssl"data="A small brown fox."digest=OpenSSL::Digest::SHA256.new# To list available digests:#OpenSSL::Digest.constantssignature=private_key.sign(digest,data)public_key.verify(digest,signature,data)# => truepublic_key.verify(digest,signature,data+"altered")# => falsepublic_key.verify(digest,"altered"+signature,data)# => false
More
Using openssl library directly we can encrypt a file.
1
openssl aes-256-cbc -a -e -in source-file.txt -out enc-file.txt -k private_key
And to decrypt the file.
1
openssl aes-256-cbc -d -a -in enc-file.txt -out unenc-file.txt -k private_key
I’m in and out of servers all day. One thing I’ve found helpful is a ssh config file. Create a file and place it ~/.ssh/config. You can add as many entries as you like.
1234
Host s3-rsync
  HostName ec2-54-203-43-190.us-west-2.compute.amazonaws.com
  User ec2-user
  IdentityFile "~/.ssh/private-key-location"
Host: A friendly name/handle which you’ll use.
HostName: The remote server address you’ll be connecting to.
User: The user you want to connect as.
IdentityFile: The private key to authenticate with.
Once its all setup you can connect by typing: ssh s3-rsync
This is the same as: ssh -i ~/.ssh/bs2-deploy ec2-user@ec2-54-203-43-190.us-west-2.compute.amazonaws.com.
Rails has taught me some really good best practices. Let’s look at a default rails create action
12345678910
defcreate@post=Post.new(post_params)respond_todo|format|if@post.saveformat.html{redirect_to@post,notice:'Post was successfully created.'}elseformat.html{render:new}endendend
I try not to deviate too much from this and nor should you. If @post.save returns true. return a 201 status code. If @post.save returns false re-render the :new action. So you can let the user fix the form.
At first glance this looks clean. But if you look closer. There is a subtle problem here. If the post object fails validation and fails to create, The action redirects to the index action where all new instaces are creating. The @post object has lost any knowlege of the params and it will not get to oportunity to display the errors from the object. You’ll have to resort to things like flash[:notice] = "@post.errors.full_messages.join()"… ugh.
Active record gives us a nice interface for displaying errors on an object.
Lately I’ve been writing a lot of angularjs. At my work, we had a great debeate.. which client side framework should we use. It came down to angularjs or ember. Ultimately, we choose angular. I’m happy we did. Angularjs is awesome. I would have been just as happy to settle with ember. Two way binding is a game changer.
Rails is great, BUT, I feel that, in any rails app, you end up creating interfaces that are a reflection of your database. Adding a client side framework, you’re free to create interfaces that are decoupled from your backend.
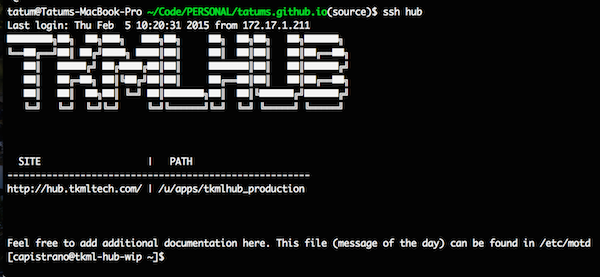
Lately I’ve been doing a lot of server administration. It can be a lot of fun automating systems. One thing I’ve found super valuable is to setup a “message of the day” file. This will display immediately after login and can be found in /etc/motd. I like to put notes/documentation here. For example, I’ll put in how to restart redis, how to tag a deploy, or the path to the app.